
In this article, we shall discuss how to create a simple app using kotlin in android where we will use kotlin to collect the XML attribute values so that when you click the login button, the action can happen in the kotlin file. By default, we used to design a login app using java language in android but currently, google who controls android studio have adopted kotlin as the language for the future android application development meaning every developer must learn how to use kotlin in apps development.
In the simple login app that we shall design and develop, we shall focus on how to add elements in the XML file and how to connect the elements with the kotlin file and check before submitting to the server that no field is empty. The data processing using APIs shall be covered in a different article.
To begin, we will need some labels which are called text views in android which will display the texts, next we shall need input fields which are called edit texts and also we shall need the button which will provide the click action.
In the xml files, we shall define a text view which will acts as a title to the page as shown below
<TextView
android:layout_width="wrap_content"
android:layout_height="wrap_content"
android:text="Enter Details to Login"
android:textColor="#000"
android:textSize="30dp"
android:id="@+id/textdisplay"
app:layout_constraintBottom_toBottomOf="parent"
app:layout_constraintLeft_toLeftOf="parent"
app:layout_constraintRight_toRightOf="parent"
app:layout_constraintTop_toTopOf="parent" />
The attributes defined in the text view are for positioning the text view, changing the color, giving it a size and defining its id
Next, we shall define a text view and an edit text that will contain the username as shown below
<TextView
android:layout_width="match_parent"
android:layout_height="wrap_content"
android:layout_marginTop="30dp"
android:textSize="20dp"
android:textColor="#000"
android:id="@+id/usernametextview"
android:text="Enter Username">
</TextView>
<EditText
android:layout_width="match_parent"
android:layout_height="wrap_content"
android:layout_marginTop="15dp"
android:hint="Enter username here"
android:id="@+id/username">
</EditText>
Next, we will repeat the process above for the password text view and edit text
<TextView
android:layout_width="match_parent"
android:layout_height="wrap_content"
android:layout_marginTop="30dp"
android:textSize="20dp"
android:textColor="#000"
android:id="@+id/passwordtextview"
android:text="Enter Password">
</TextView>
<EditText
android:layout_width="match_parent"
android:layout_height="wrap_content"
android:layout_marginTop="15dp"
android:inputType="textPassword"
android:hint="Enter password here"
android:id="@+id/password">
</EditText>
Finally, we will define a button that will have the action for log in
<Button
android:layout_width="match_parent"
android:layout_height="wrap_content"
android:layout_marginTop="10dp"
android:id="@+id/loginbutton"
android:text="Login">
</Button>
The layout used to ensure that the above elements position themselves is the linear layout with an orientation set to vertical to ensure that the items aligns themselves in a vertical manner from top to bottom. You can refer to a previous article on layouts in this link
The full xml file code is as below
<?xml version="1.0" encoding="utf-8"?>
<androidx.constraintlayout.widget.ConstraintLayout xmlns:android="http://schemas.android.com/apk/res/android"
xmlns:app="http://schemas.android.com/apk/res-auto"
xmlns:tools="http://schemas.android.com/tools"
android:layout_width="match_parent"
android:layout_height="match_parent"
android:background="@color/teal_200"
tools:context=".MainActivity">
<LinearLayout
android:layout_width="match_parent"
android:layout_height="match_parent"
android:orientation="vertical"
android:layout_marginLeft="40dp"
android:layout_marginRight="40dp"
android:layout_marginTop="100dp">
<TextView
android:layout_width="wrap_content"
android:layout_height="wrap_content"
android:text="Enter Details to Login"
android:textColor="#000"
android:textSize="30dp"
android:id="@+id/textdisplay"
app:layout_constraintBottom_toBottomOf="parent"
app:layout_constraintLeft_toLeftOf="parent"
app:layout_constraintRight_toRightOf="parent"
app:layout_constraintTop_toTopOf="parent" />
<TextView
android:layout_width="match_parent"
android:layout_height="wrap_content"
android:layout_marginTop="30dp"
android:textSize="20dp"
android:textColor="#000"
android:id="@+id/usernametextview"
android:text="Enter Username">
</TextView>
<EditText
android:layout_width="match_parent"
android:layout_height="wrap_content"
android:layout_marginTop="15dp"
android:hint="Enter username here"
android:id="@+id/username">
</EditText>
<TextView
android:layout_width="match_parent"
android:layout_height="wrap_content"
android:layout_marginTop="30dp"
android:textSize="20dp"
android:textColor="#000"
android:id="@+id/passwordtextview"
android:text="Enter Password">
</TextView>
<EditText
android:layout_width="match_parent"
android:layout_height="wrap_content"
android:layout_marginTop="15dp"
android:inputType="textPassword"
android:hint="Enter password here"
android:id="@+id/password">
</EditText>
<Button
android:layout_width="match_parent"
android:layout_height="wrap_content"
android:layout_marginTop="10dp"
android:id="@+id/loginbutton"
android:text="Login">
</Button>
</LinearLayout>
</androidx.constraintlayout.widget.ConstraintLayout>
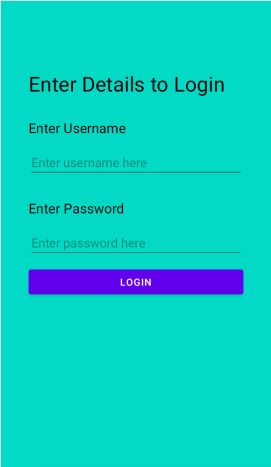
The above design will result in a screen shown in the below image
Having defined the above design, we will now move to the kotlin file so that we can add the login functionality.
First, you will need to import the elements that we will use in our code, which is Edit text, Button, Toast, and checking if the string is empty as shown below
import android.text.TextUtils.isEmpty
import android.widget.Button
import android.widget.EditText
import android.widget.Toast
Next, we will need to collect the attributes we defined in the xml file, that is, username and password inputs and login button. This is done inside the main activity class
var username = findViewById(R.id.username) as EditText
var password = findViewById(R.id.password) as EditText
var loginbutton = findViewById(R.id.loginbutton) as Button
Next, we define the action that happens when we click the login button, at this step we convert the inputs username and password to string and also we check whether either username or password do not have values.
loginbutton.setOnClickListener {
val username = username.text;
val password = password.text;
if(isEmpty(username) || isEmpty(password)){
Toast.makeText(this@MainActivity, "Please fill all fields", Toast.LENGTH_LONG).show()
}else{
// your code to validate the user_name and password combination
// and verify the same
}
}
Having done the above, the next step is connecting it with the server through the API which we will discuss in the next article.
The full code for kotlin file is as below
package com.example.kotlinexample
import androidx.appcompat.app.AppCompatActivity
import android.os.Bundle
import android.text.TextUtils.isEmpty
import android.widget.Button
import android.widget.EditText
import android.widget.Toast
class MainActivity : AppCompatActivity() {
override fun onCreate(savedInstanceState: Bundle?) {
super.onCreate(savedInstanceState)
setContentView(R.layout.activity_main)
var username = findViewById(R.id.username) as EditText
var password = findViewById(R.id.password) as EditText
var loginbutton = findViewById(R.id.loginbutton) as Button
// set on-click listener
loginbutton.setOnClickListener {
val username = username.text;
val password = password.text;
if(isEmpty(username) || isEmpty(password)){
Toast.makeText(this@MainActivity, "Please fill all fields", Toast.LENGTH_LONG).show()
}else{
// your code to validate the user_name and password combination
// and verify the same
}
}
}
}
Having followed the above steps, you will come up with a simple login app using kotlin. Follow our next articles to learn how to connect with an online server using API and check whether the values entered match the one in the database.