
The navigation drawer in android is a hidden menu that slides on the left section of an application when the menu is clicked. The navigation drawer is used since it accommodates more than one activity in the navigation list.
Navigation drawer in android is the same concept that is applied in web development while working with the responsive design where the navigation in a mobile device is hidden and only shows when the navigation button is clicked.
In this article, we shall discuss how you can create a navigation drawer in android and install the application on your mobile device
To create a navigation drawer in android, follow the steps below
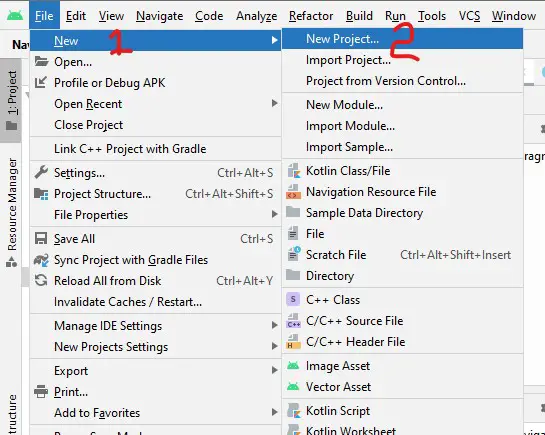
- In the android studio, click file then new finally new project
- In the modal that pops up, scroll down and select navigation drawer activity
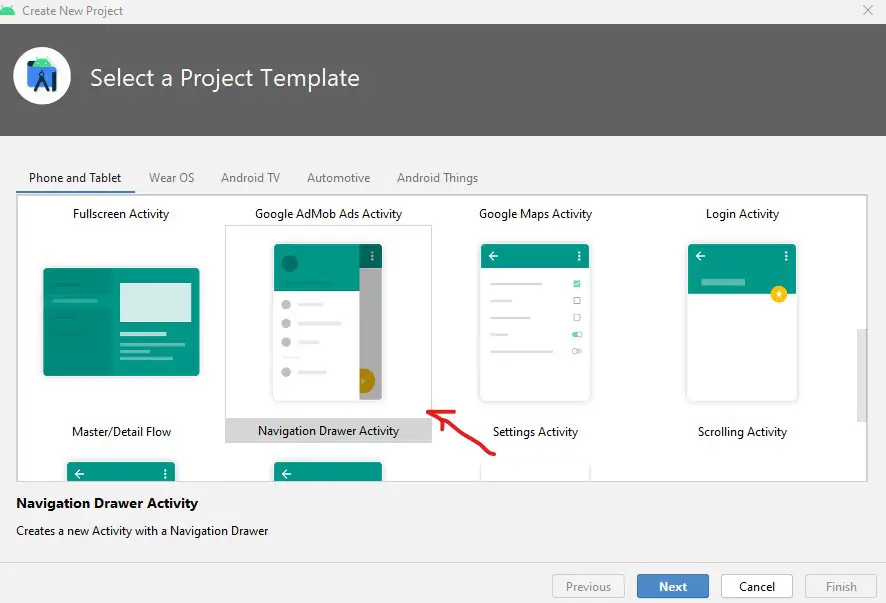
- Click next after selecting navigation drawer activity
- In the next screen, add the project name and select the language you want to use either kotlin or java

- Click finish
- Wait for Gradle to build the project files
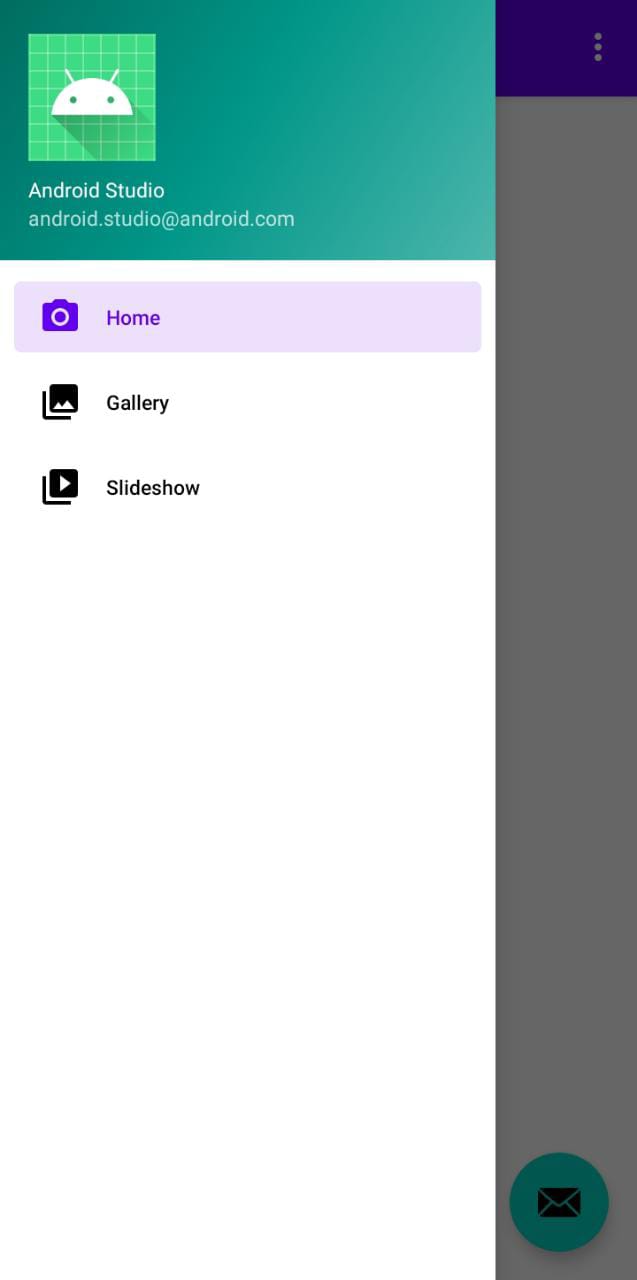
- Once done, a navigation drawer will be created with default items on the sliding left menu
Like we are used before, the navigation drawer does not create activity_main.xml, rather it creates content_main.xml which has a fragment that hosts the mobile navigation
content_main.xml will have a code like the one shown below
<?xml version="1.0" encoding="utf-8"?>
<androidx.constraintlayout.widget.ConstraintLayout xmlns:android="http://schemas.android.com/apk/res/android"
xmlns:app="http://schemas.android.com/apk/res-auto"
xmlns:tools="http://schemas.android.com/tools"
android:layout_width="match_parent"
android:layout_height="match_parent"
app:layout_behavior="@string/appbar_scrolling_view_behavior"
tools:showIn="@layout/app_bar_main">
<fragment
android:id="@+id/nav_host_fragment"
android:name="androidx.navigation.fragment.NavHostFragment"
android:layout_width="match_parent"
android:layout_height="match_parent"
app:defaultNavHost="true"
app:layout_constraintLeft_toLeftOf="parent"
app:layout_constraintRight_toRightOf="parent"
app:layout_constraintTop_toTopOf="parent"
app:navGraph="@navigation/mobile_navigation" />
</androidx.constraintlayout.widget.ConstraintLayout>
The mobile_navigation.xml will contain the default items that are added to the sliding menu by default
nav_home.xml will have a sample code like one shown below
<?xml version="1.0" encoding="utf-8"?>
<androidx.constraintlayout.widget.ConstraintLayout xmlns:android="http://schemas.android.com/apk/res/android"
xmlns:app="http://schemas.android.com/apk/res-auto"
xmlns:tools="http://schemas.android.com/tools"
android:layout_width="match_parent"
android:layout_height="match_parent"
tools:context=".ui.home.HomeFragment">
<TextView
android:id="@+id/text_home"
android:layout_width="match_parent"
android:layout_height="wrap_content"
android:layout_marginEnd="8dp"
android:layout_marginStart="8dp"
android:layout_marginTop="8dp"
android:textAlignment="center"
android:textSize="20sp"
app:layout_constraintBottom_toBottomOf="parent"
app:layout_constraintEnd_toEndOf="parent"
app:layout_constraintStart_toStartOf="parent"
app:layout_constraintTop_toTopOf="parent" />
</androidx.constraintlayout.widget.ConstraintLayout>
Also, the other items will have the code as shown above. To add other features to the navigation items or sliding items, we shall do it in the upcoming articles
The code for MainActivity.kt which will define how the navigation drawer will appear is as shown below
package com.example.navigationdrawer
import android.os.Bundle
import android.view.Menu
import com.google.android.material.floatingactionbutton.FloatingActionButton
import com.google.android.material.snackbar.Snackbar
import com.google.android.material.navigation.NavigationView
import androidx.navigation.findNavController
import androidx.navigation.ui.AppBarConfiguration
import androidx.navigation.ui.navigateUp
import androidx.navigation.ui.setupActionBarWithNavController
import androidx.navigation.ui.setupWithNavController
import androidx.drawerlayout.widget.DrawerLayout
import androidx.appcompat.app.AppCompatActivity
import androidx.appcompat.widget.Toolbar
class MainActivity : AppCompatActivity() {
private lateinit var appBarConfiguration: AppBarConfiguration
override fun onCreate(savedInstanceState: Bundle?) {
super.onCreate(savedInstanceState)
setContentView(R.layout.activity_main)
val toolbar: Toolbar = findViewById(R.id.toolbar)
setSupportActionBar(toolbar)
val fab: FloatingActionButton = findViewById(R.id.fab)
fab.setOnClickListener { view ->
Snackbar.make(view, "Replace with your own action", Snackbar.LENGTH_LONG)
.setAction("Action", null).show()
}
val drawerLayout: DrawerLayout = findViewById(R.id.drawer_layout)
val navView: NavigationView = findViewById(R.id.nav_view)
val navController = findNavController(R.id.nav_host_fragment)
// Passing each menu ID as a set of Ids because each
// menu should be considered as top level destinations.
appBarConfiguration = AppBarConfiguration(setOf(
R.id.nav_home, R.id.nav_gallery, R.id.nav_slideshow), drawerLayout)
setupActionBarWithNavController(navController, appBarConfiguration)
navView.setupWithNavController(navController)
}
override fun onCreateOptionsMenu(menu: Menu): Boolean {
// Inflate the menu; this adds items to the action bar if it is present.
menuInflater.inflate(R.menu.main, menu)
return true
}
override fun onSupportNavigateUp(): Boolean {
val navController = findNavController(R.id.nav_host_fragment)
return navController.navigateUp(appBarConfiguration) || super.onSupportNavigateUp()
}
}
When you run the code and install the application on your mobile device, the following will be the result
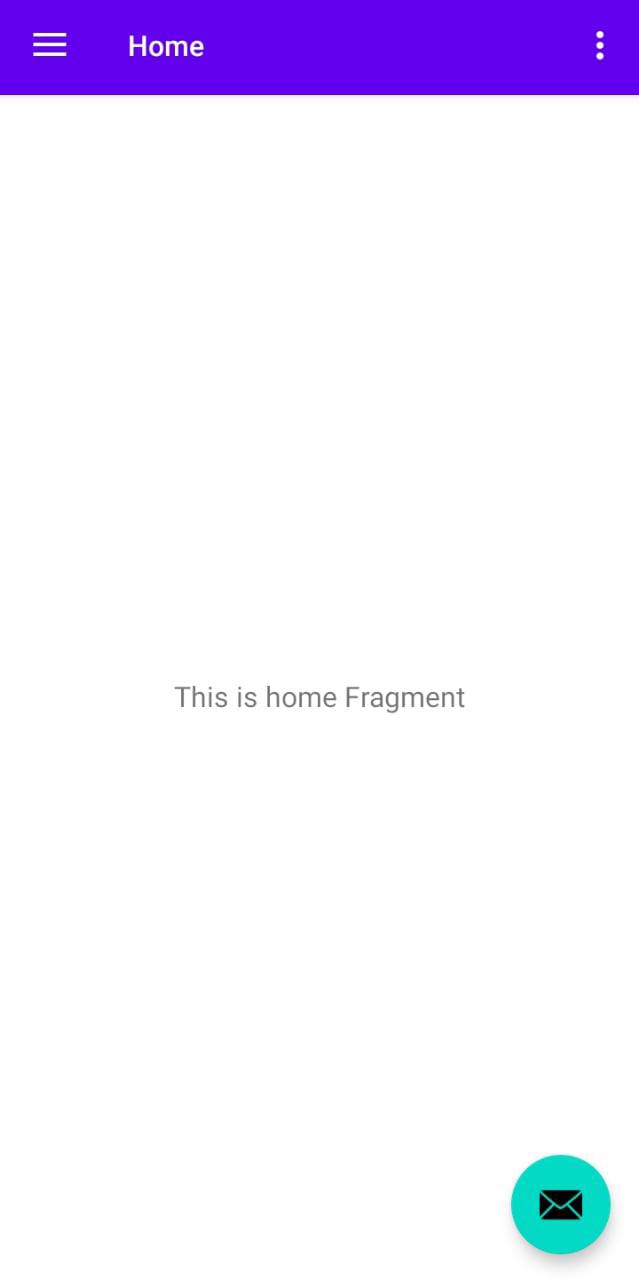
To view the items in the navigation drawer click the 3 lines at the top left and the sliding navigation will appear as shown
Follow our next articles as we show you how you can add content to the navigation items, how you can change icon in the navigation drawer, and also how to add another navigation item at the same time customizing the navigation drawer to match your theme