
Firebase is a platform that provides developers with tools and the architecture to build, develop and grow an application
Firebase is one of the services provided by Google and supports mobile platforms so that the developer can produce applications that are high quality and at the same time grow his user base.
Firebase is used since it provides various features including analytics, crash reports on the app called crashlytics, and cloud messaging which is used to send in-app notifications to registered mobile devices
Firebase also supports real-time database data storage whereby you can use it as the main data storage in the cloud
Firebase also supports authentication and sign-in of users through Facebook and google sign in
Therefore, there is a need as an android developer to connect your app to firebase due to the many features that firebase offers
To connect Firebase to the android studio for a specific project, follow the steps shown below
- Visit the Firebase console so that you can add your project https://console.firebase.google.com/
- You will have to log in using any of your google accounts
If there are other existing projects, the screen will be as below
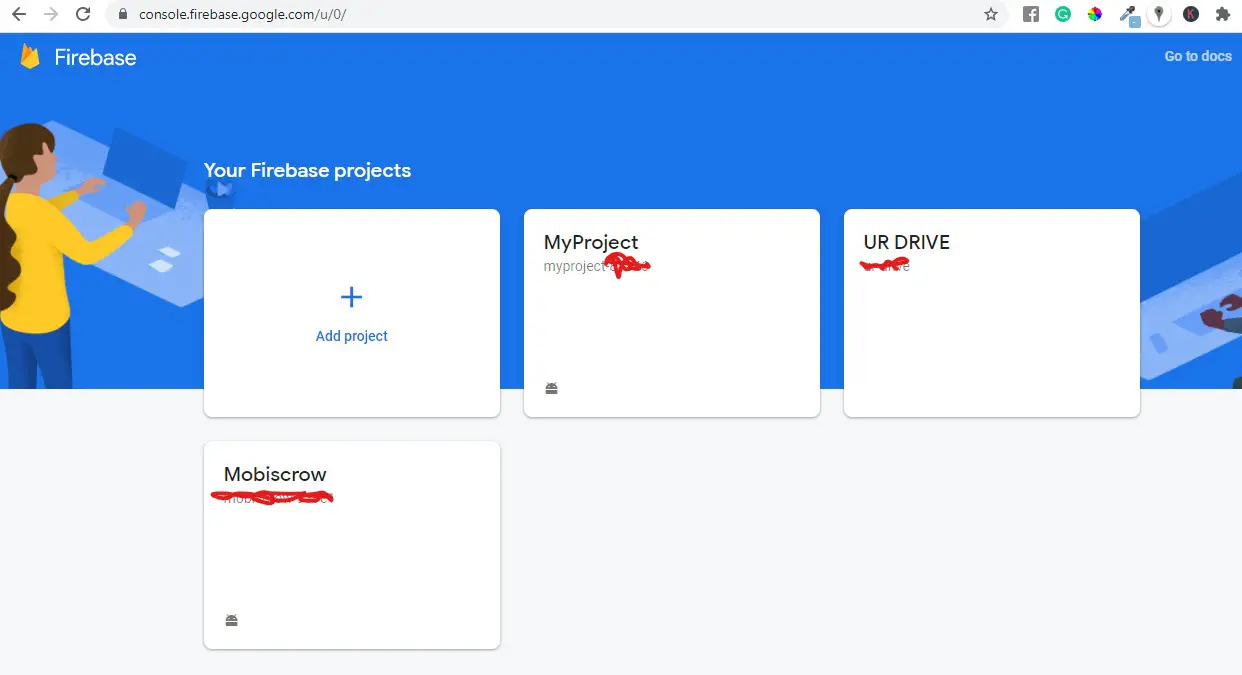
- Click on add project
- Add your project name, you can match the project name in firebase with the project name in android studio for easier identification when you have multiple projects
- Click continue after adding the project name
- In the next screen, disable the google analytics options for now and click crate project
- Wait for the net screen to complete so that your project is created. When the project is ready click continue
- The next screen that will appear will be the dashboard of the project you have created

- Firebase supports web, android, and ios. In this case, select the android icon from the dashboard
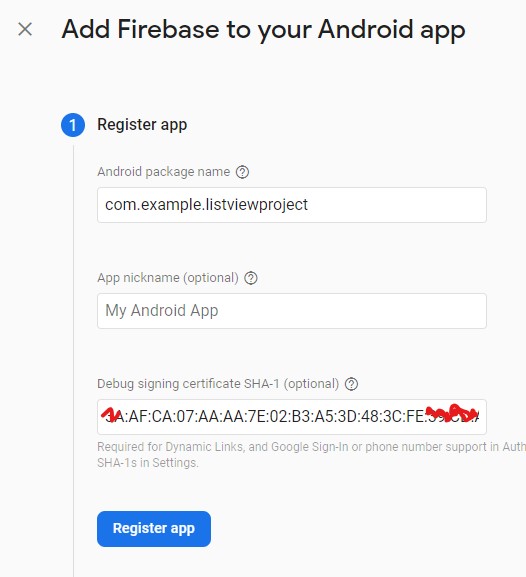
- In the next screen, you will need to add firebase to your app by first registering your project
- Add the package name of your app in android studio. You can get the app package name from the build Gradle of the app
The application id in the app Gradle file is the package name
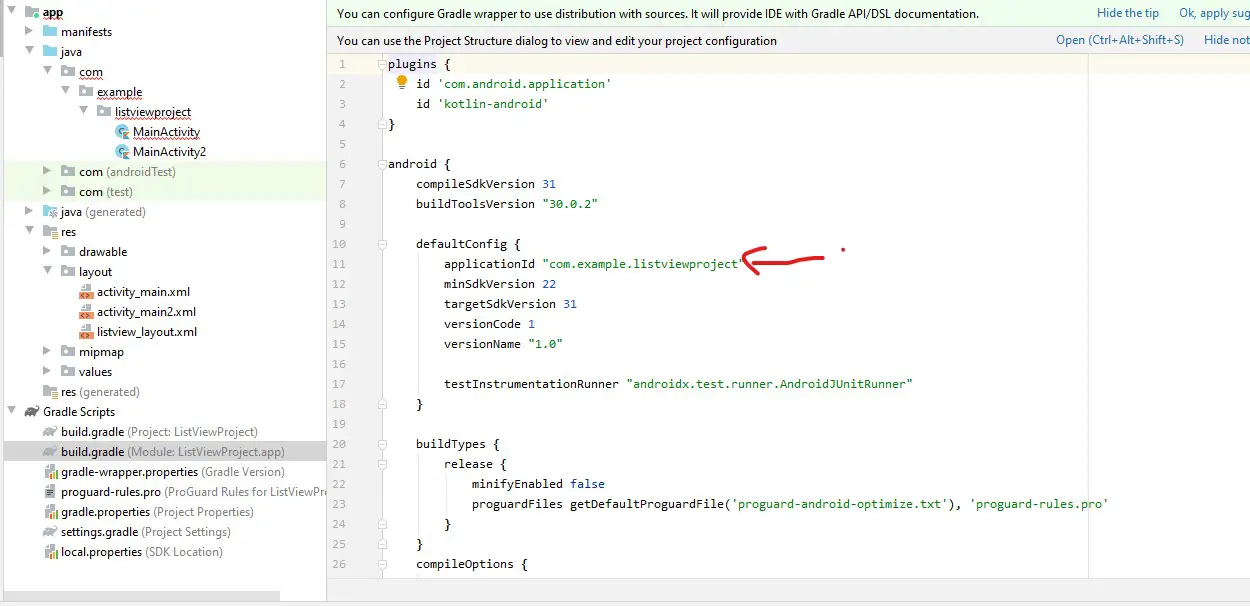
Add the android package name
You can leave the app nickname as empty
- You are required to add the debug signing certificate as SHA-1 characters
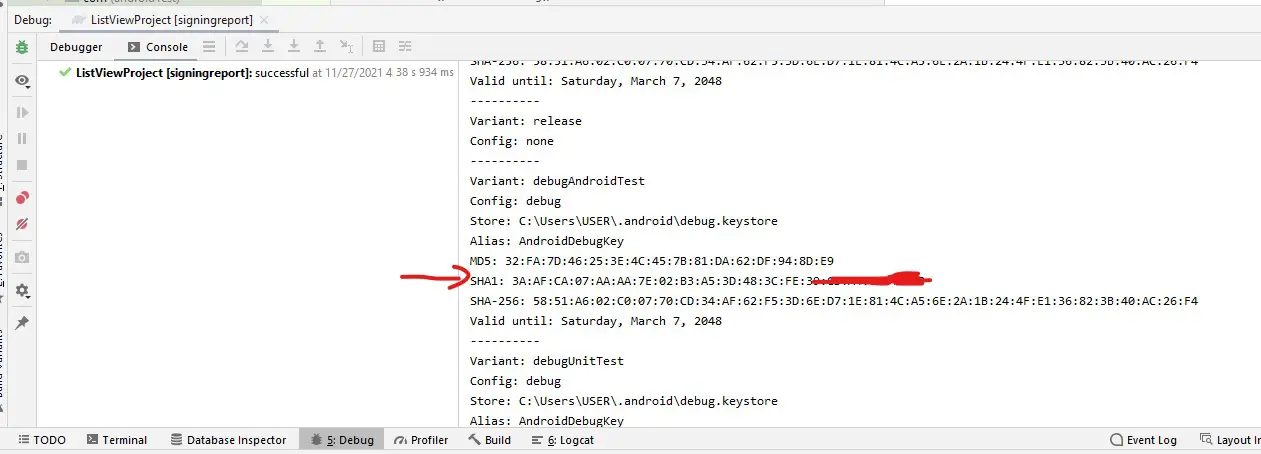
To get the debug signing certificate,
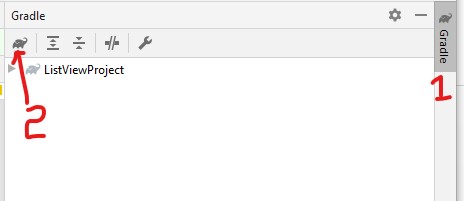
- At the top right of android studio, click the Gradle link
- On the screen that appears, click execute Gradle task represented by a rhino icon
- Another screen will appear, type signingreport and click enter
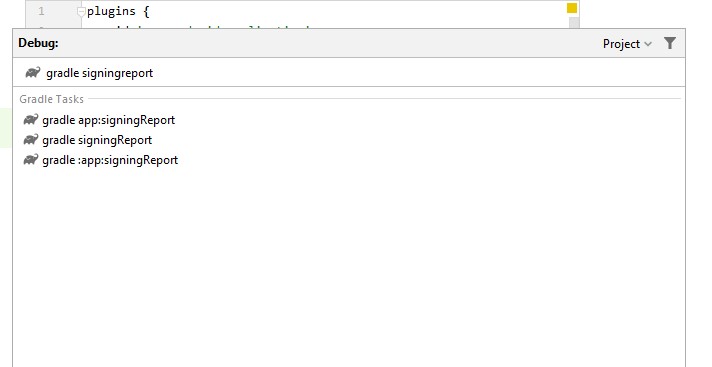
- At the bottom of the screen, the execution of the Gradle tasks will appear.
Once it's done, an SHA-1 signing certificate will be generated
Copy the SHA-1 certificate and paste it to the firebase registering the app
- Once you have added the SHA-1 certificate, click register app
- Download the config file that is generated after registering your app in firebase
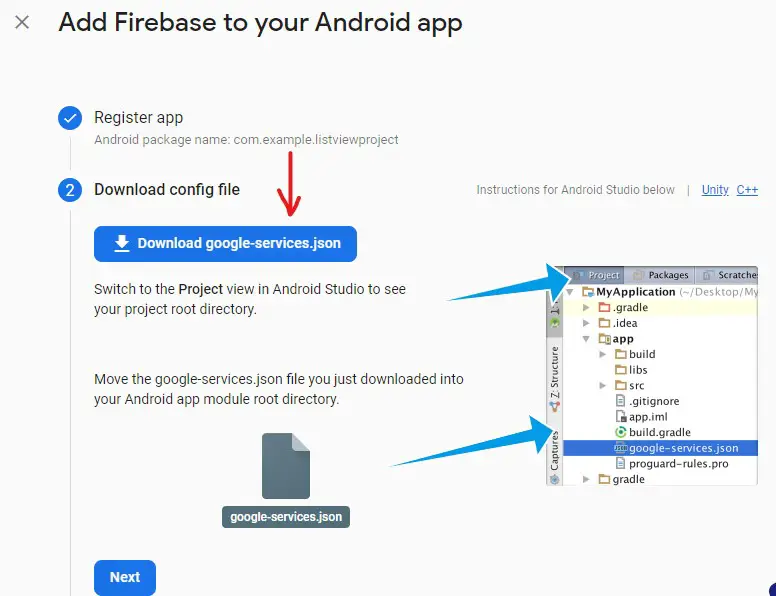
- Click next after downloading the config file
What follows next is how to connect Firebase to your app in android
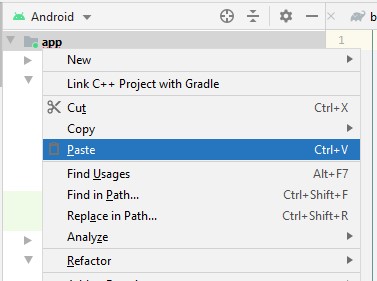
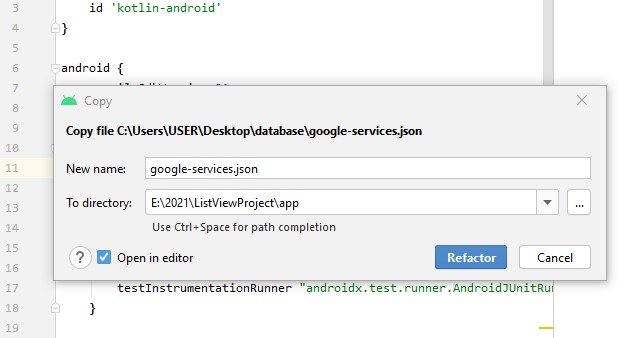
- Copy the config file that you have downloaded
- Right-click on the app in android studio for the selected project and click paste
- A new modal will pop up with the config file, click refractor
- A screen will open of the google-services.json with all the components in it
{
"project_info": {
"project_number": "284340592770",
"project_id": "listviewproject-25123",
"storage_bucket": "listviewproject-25123.appspot.com"
},
"client": [
{
"client_info": {
"mobilesdk_app_id": "1:284340592770:android:a296466fa7bf58e81a949b",
"android_client_info": {
"package_name": "com.example.listviewproject"
}
},
"oauth_client": [
{
"client_id": "284340592770-p8ina4bfqa9k8776rutp25sbjiknp0hs.apps.googleusercontent.com",
"client_type": 1,
"android_info": {
"package_name": "com.example.listviewproject",
"certificate_hash": "3aafca07aaaa7e02b3a53d483cfe39cda47c4bbb"
}
},
{
"client_id": "284340592770-rpff88k0l7e22udf08jq2j57aln8v3dm.apps.googleusercontent.com",
"client_type": 3
}
],
"api_key": [
{
"current_key": "AIzaSyCb-oNNkL2o0REDA2bV9FBKy1HycANu3cM"
}
],
"services": {
"appinvite_service": {
"other_platform_oauth_client": [
{
"client_id": "284340592770-rpff88k0l7e22udf08jq2j57aln8v3dm.apps.googleusercontent.com",
"client_type": 3
}
]
}
}
}
],
"configuration_version": "1"
}
- Open the build Gradle for the project (not for the app)
- The third step in adding firebase to the app is adding the Firebase SDK
- Copy the classpath dependency and add it to the build Gradle for the project
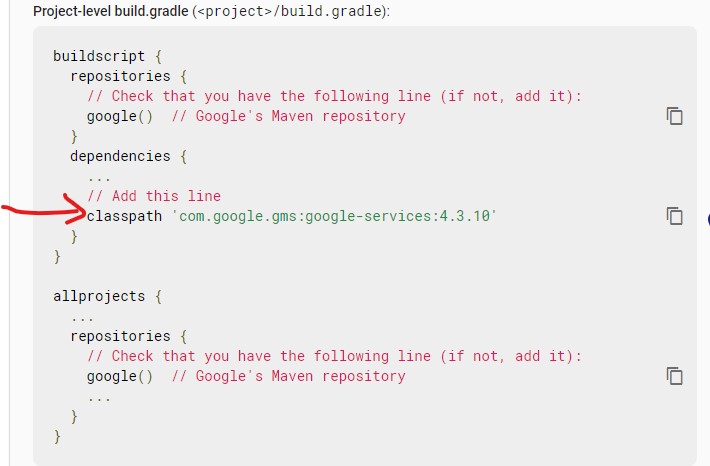
The full build gradle for the project is as follows
// Top-level build file where you can add configuration options common to all sub-projects/modules.
buildscript {
ext.kotlin_version = "1.4.32"
repositories {
google()
jcenter()
}
dependencies {
classpath "com.android.tools.build:gradle:4.1.3"
classpath "org.jetbrains.kotlin:kotlin-gradle-plugin:$kotlin_version"
classpath 'com.google.gms:google-services:4.3.10'
// NOTE: Do not place your application dependencies here; they belong
// in the individual module build.gradle files
}
}
allprojects {
repositories {
google()
jcenter()
}
}
task clean(type: Delete) {
delete rootProject.buildDir
}
- Next, open the build Gradle for the app and add the google gsm services and the import firebase
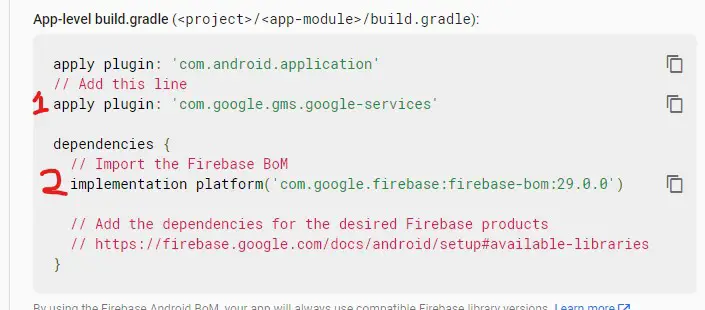
The full build gradle for the app code is as follows
plugins {
id 'com.android.application'
id 'kotlin-android'
id: 'com.google.gms.google-services'
}
android {
compileSdkVersion 31
buildToolsVersion "30.0.2"
defaultConfig {
applicationId "com.example.listviewproject"
minSdkVersion 22
targetSdkVersion 31
versionCode 1
versionName "1.0"
testInstrumentationRunner "androidx.test.runner.AndroidJUnitRunner"
}
buildTypes {
release {
minifyEnabled false
proguardFiles getDefaultProguardFile('proguard-android-optimize.txt'), 'proguard-rules.pro'
}
}
compileOptions {
sourceCompatibility JavaVersion.VERSION_1_8
targetCompatibility JavaVersion.VERSION_1_8
}
kotlinOptions {
jvmTarget = '1.8'
}
}
dependencies {
implementation "org.jetbrains.kotlin:kotlin-stdlib:$kotlin_version"
implementation 'androidx.core:core-ktx:1.7.0'
implementation 'androidx.appcompat:appcompat:1.3.1'
implementation 'com.google.android.material:material:1.4.0'
implementation 'androidx.constraintlayout:constraintlayout:2.1.1'
implementation 'androidx.swiperefreshlayout:swiperefreshlayout:1.0.0'
testImplementation 'junit:junit:4.+'
androidTestImplementation 'androidx.test.ext:junit:1.1.3'
androidTestImplementation 'androidx.test.espresso:espresso-core:3.4.0'
// Import the Firebase BoM
implementation platform('com.google.firebase:firebase-bom:29.0.0')
}
You will see a message at the top of the android studio with the message Gradle files have changed click sync now to implement the changes
Once Gradle has finished syncing the changes that will be it. You will have learned how to connect your app with firebase and your app will be linked to firebase successfully and can use the firebase resources with ease
Thank you for following this article.