
Kotlin is an open-source programming language that supports both object-oriented and functional programming. Kotlin is easy to develop applications in android since it borrows much from java language, therefore if you are familiar with java language you will not have a hard time working with kotlin.
Kotlin syntax is not different from other languages including java. You can use either Java or kotlin to develop an android application in the android studio though kotlin is the preferred language for Android development in the latest years.
The reason why kotlin is mostly preferred these years is that developers of libraries to use in the android studio starting with google who owns and controls android studio are embracing kotlin language meaning in few years to come everything will have shifted to kotlin supported only.
In a previous article, we discussed how to create your first application where we used java as the preferred option. In this article, we shall now shift our focus and discuss how to build an app using kotlin.
You will note that there are not many differences while using java and using kotlin. We shall show what it takes to set up an application that is kotlin specific so that in our upcoming articles, we shall discuss how to do certain actions after you have created an application using kotlin.
To begin
- Open android studio and wait for it to build all the files that are required during startup
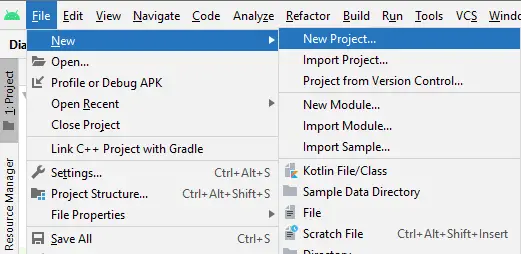
- On the top left, click on file a floating menu will appear
- Click on New, a new floating menu will appear on its right scroll to it and click New Project
- A modal will open which will ask you to select a project template
A template is a predefined screen that has designs that can help you achieve a certain function. In this case, we select empty activity which we use when we want to custom made our app
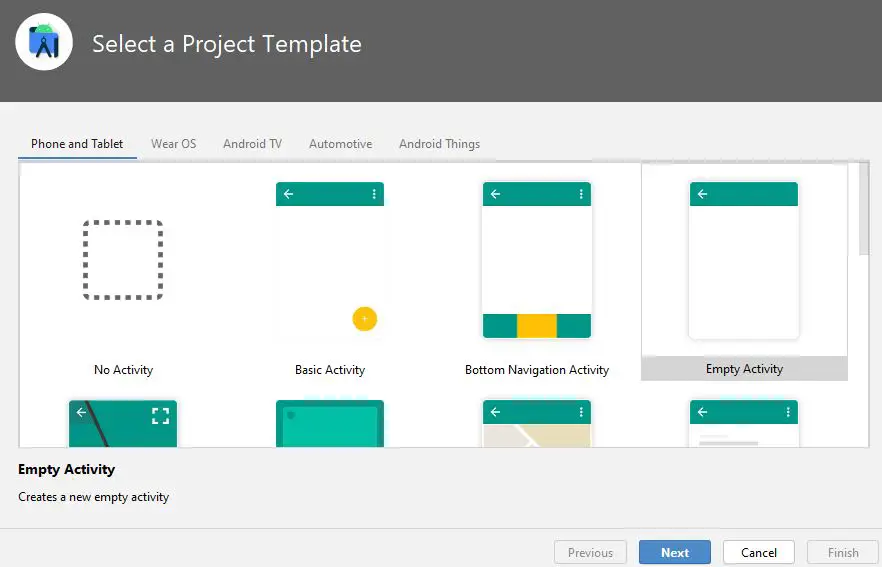
- Select next
- The screen that loads is the one that determines the language that we will use, that is, java or kotlin
First, start by adding your project name, in this case, we will use Kotlin Example
Leave the package name as it is
You can change the location where you want to save your project inside the computer directories
In the language section, select kotlin
Leave the minimum SDK as it is
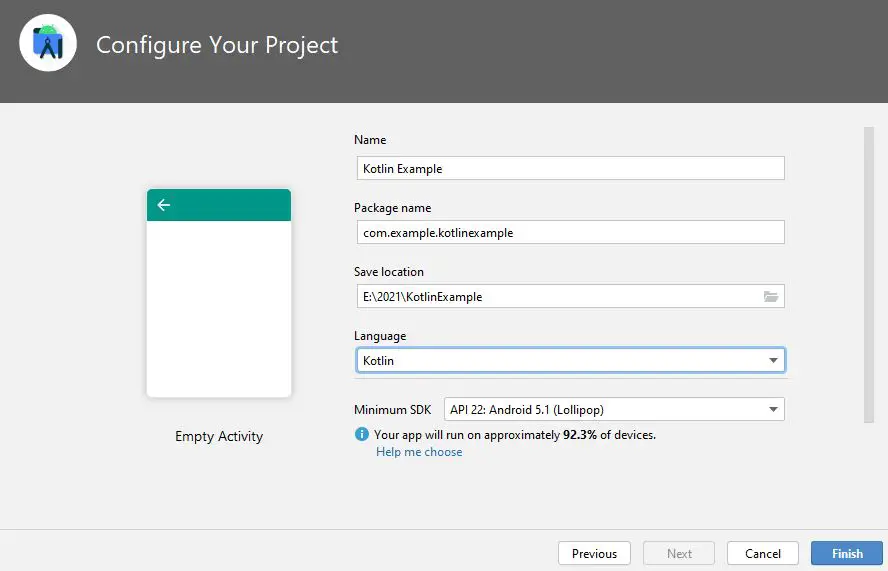
- Click finish
- Once that is done, wait for Gradle to build so that that project can be set up
You will notice that two tabs will be created, activity_main.xml and MainActivity.kt. These are the default files that are required when you start building your application.
The xml file holds the design codes and it is the same as when using java. Its sample will be shown as below
<?xml version="1.0" encoding="utf-8"?>
<androidx.constraintlayout.widget.ConstraintLayout xmlns:android="http://schemas.android.com/apk/res/android" xmlns:app="http://schemas.android.com/apk/res-auto" xmlns:tools="http://schemas.android.com/tools"
android:layout_width="match_parent"
android:layout_height="match_parent"
tools:context=".MainActivity">
<TextView
android:layout_width="wrap_content"
android:layout_height="wrap_content"
android:text="Hello World!"
app:layout_constraintBottom_toBottomOf="parent" app:layout_constraintLeft_toLeftOf="parent"
app:layout_constraintRight_toRightOf="parent"
app:layout_constraintTop_toTopOf="parent" /> </androidx.constraintlayout.widget.ConstraintLayout>
The kt file will be the one to have the functionality of the app. The sample code snippet is as below
package com.example.kotlinexample
import androidx.appcompat.app.AppCompatActivity
import android.os.Bundle
class MainActivity : AppCompatActivity() {
override fun onCreate(savedInstanceState: Bundle?) {
super.onCreate(savedInstanceState)
setContentView(R.layout.activity_main)
}
}
When you run the above code it will execute and build an app in your mobile device or the testing device you are using including the emulator. The app that will be published will have an interface with hello world text in it.
The above article has highlighted on the basic steps of creating an application using kotlin. Follow this domain for more articles that will be function-specific for using kotlin to develop applications.