This article will focus on how to check for the availability of your desired domain name, purchase the domain, add a hosting space and upload your website files. You will notice that this is a very simple and straightforward activity that will consume less of your time and it does not require those technical skills as some describe it, what is important is following the steps as highlighted in the hosting provider.
Please note that this is a continuation of an article in which we laid the foundation about hosting a website where we discussed on the factors to consider before hosting a website and also the important steps you should not miss before setting up and deciding which hosting provider you should use. Please follow those steps and be familiar with the factors here before proceeding on hosting your website.
For this article, I will use the example of Blue Host Company to describe the steps (you may consider a company of your choice depending on the factors we have discussed in the previous article)
- Visit Blue host official website https://www.bluehost.com/track/solutionspace/ (or your desired company website)
- Navigate on the domain section by clicking domains in the navigation bar
- Enter your preferred domain name which you will use for your website
- Once you enter the domain name, choose an extension eg .com, .org depending on the purpose of your website

For the demonstration, I will use a random name exampletutorials.com
- Click on search
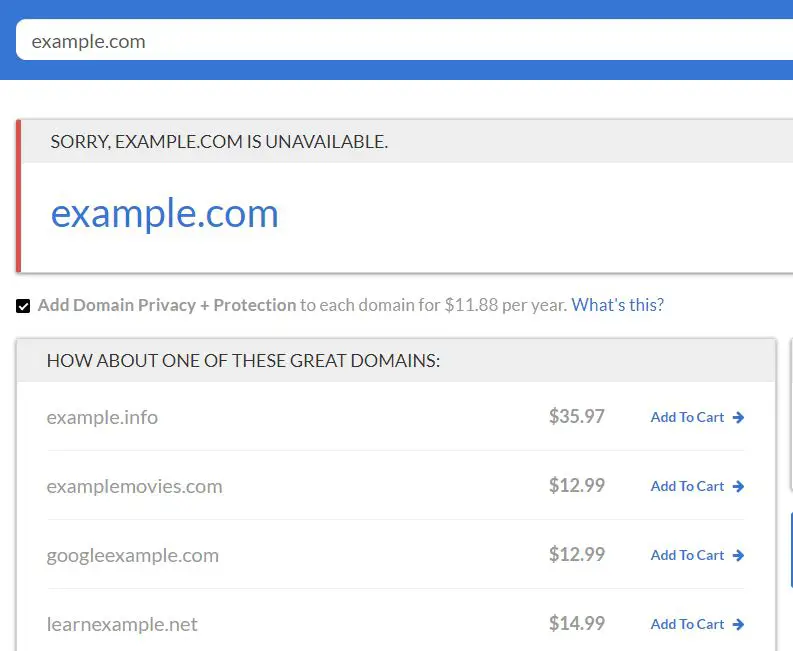
What happens here is that your request is submitted to the central database of all domain names in the world and checks whether your name is available for use or is already booked or purchased by another entity.
- If your name is already in use, an error message is displayed meaning you can try again but in the down section, they provide you with another option to consider related to the name you entered
For example, example.com is unavailable so the screen displayed is as shown below
- If you decide to change the name and try another one, at the top section you can type another name and click the search button
- If your name is found, in this case, the name am using exampletutorials.com is available, so am given a success message saying that the name is available for use
- By now, the domain is already added to the shopping cart and its ready for the next step
Please note you can remove the Privacy + Protection added by blue host and leave the domain purchase only.
In the domain section, you can choose the duration you want to purchase your domain, options are either 1 year or more than 1 year. To start with you can select the default 1 year option
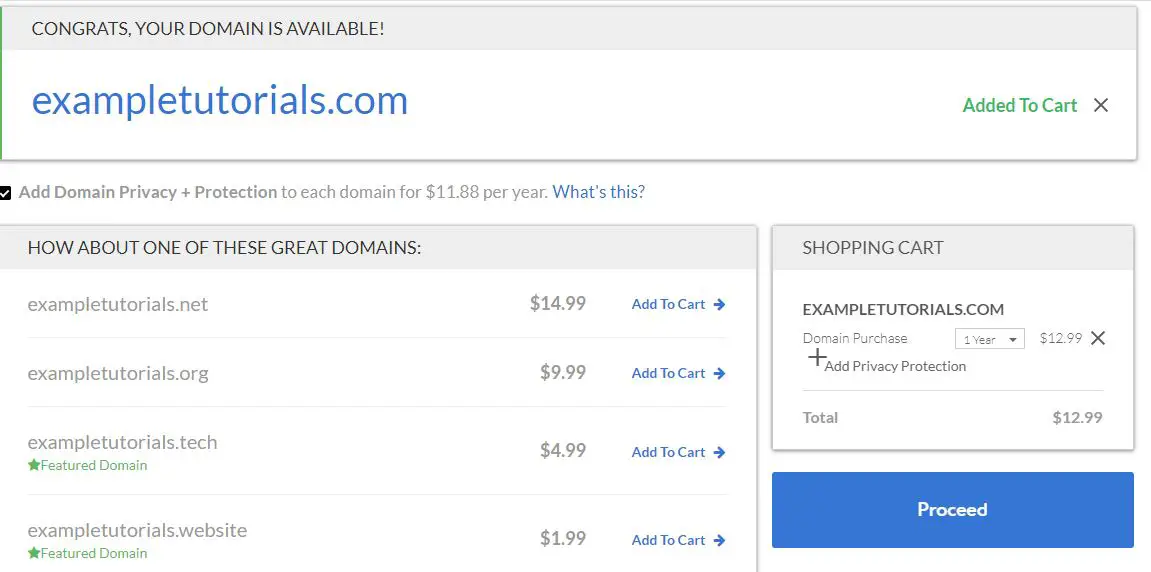
- Click on the proceed button
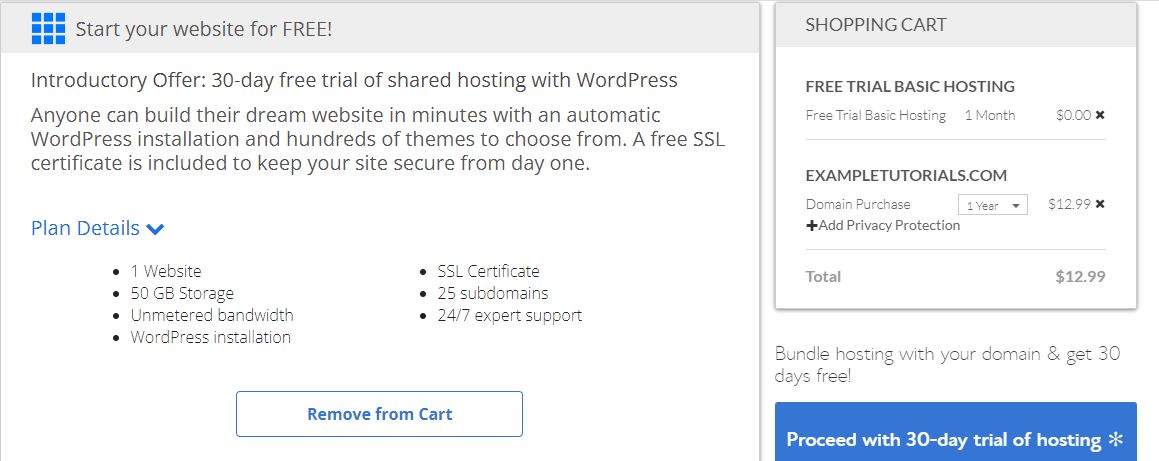
- On the next screen, you are given options to add your hosting plans
To start, blue host gives you an option for free shared web hosting for one month (you will have to pay the set rates after one month)
- View the plan details which includes 50GB space which is good for a starter website
- Click add free hosting which will update your shopping cart as shown in the screen below
- Click on the proceed button
- In the next screen, you will be provided with the screen to add your details
- Next add your payment details either card or PayPal
- Once done click the purchase now button
Having done that, the process of checkout will be complete and your order will be processed.
You will get a confirmation in your email.
Now, you will have to wait for a certain period of time for propagation to happen, that is, the time it takes for your domain to be set up. It varies from one provider to another and takes from 1 hour to 48 hours.
At this time, when you search for your purchased domain name in the browser, you will notice that it is not available.
Keep checking on your email from time to time until your hosting provider sends an email with login details to your Cpanel.
How to upload website files in the hosting server space
Once you receive the login details, you can access the server space from the link provided in your email or type your domain name and add Cpanel at the end, that is, for my example domain exampledomain.com/cpanel
Enter your username and password provided and click log in
Once you successfully log in, you will find a Cpanel dashboard which may vary in layout depending on your hosting provider
To upload your website files in the Cpanel dashboard
- In the files section, click on file manager
- For your website files to be visible, add them in the public_html folder in the screen that opens
- Click on the upload button at the top navigation and select or drop your files from your computer
- Wait for the upload to complete
- Once done, you can check them by typing your domain name URL in the browser
Conclusion
Having followed the steps above, you will by now achieved the process of buying your domain and hosting space and uploaded your website files in the in hosting space, and make them available for other users to view.